Author: admin

  • Not Built for Muscles Alone: Functional Workouts That Build Real-World Strength and Stability

    Not Built for Muscles Alone: Functional Workouts That Build Real-World Strength and Stability

    There’s a calm point in training when you realize you’re no longer working for a reflection in the mirror or a number on a scoreboard. You’re training for how your body moves through daily life: climbing stairs without effort, lifting a suitcase with confidence, or catching yourself if you lose balance. That’s where athletic gymnastics fits in. It’s a practical, structured way to build strength that serves real life, not just the gym. Follow along, and you’ll see how this approach helps you get stronger in a steady, sustainable way.

    What athletic gymnastics actually means

    Athletic gymnastics is a method of strength training centered on whole-body control, balance, and usable power. Instead of pushing maximum weights, the focus stays on smooth execution, stable positions, and manageable loads. The aim is a body that feels capable and responsive rather than worn down or stiff. This makes it suitable for a wide range of ages and fitness backgrounds, especially when paired with light mobility work for joints and the spine.

    Workouts emphasize posture, coordination, and joint-friendly movement ranges. You’re training your body to handle everyday demands with ease: carrying shopping bags, playing with children, rearranging furniture, or staying comfortable during long days of activity. The result is functional strength that supports your lifestyle instead of limiting it.

    Main exercise categories in athletic gymnastics

    This training style blends several types of exercises. Together, they create a balanced system where intensity can be adjusted without losing focus on control and quality.
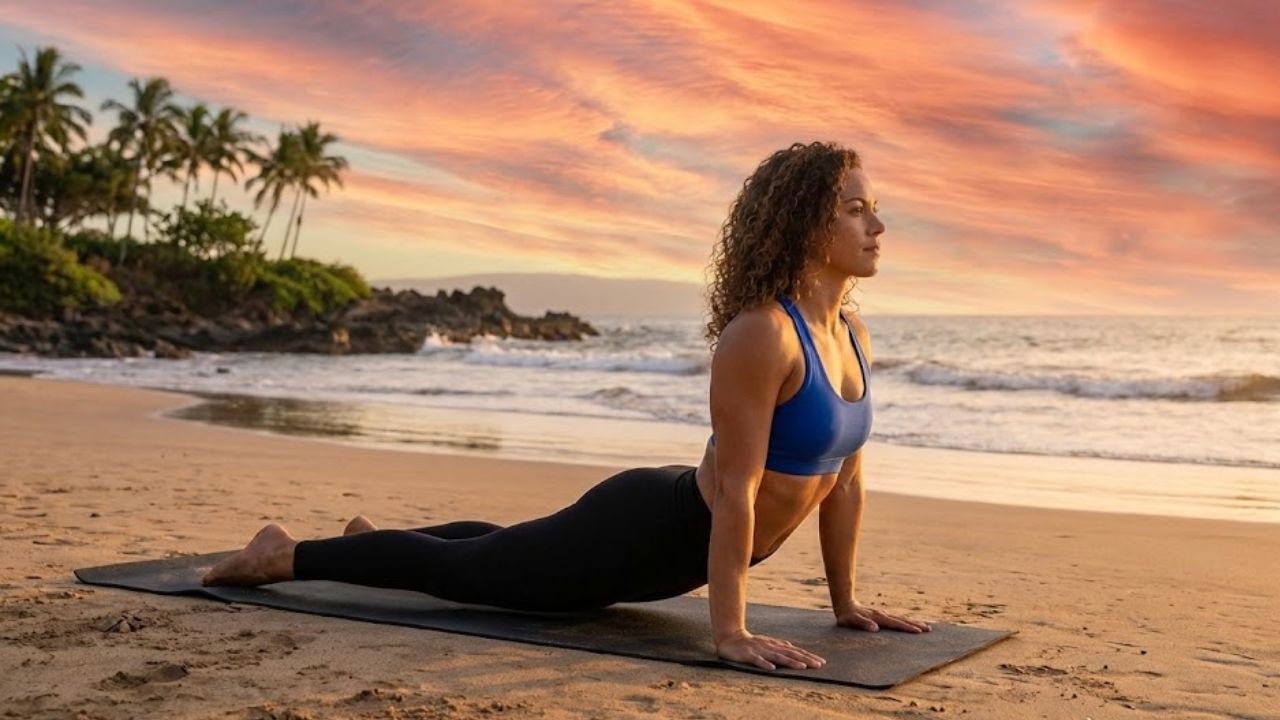
    Bodyweight movements. Exercises like push-ups, holds, and strength poses using your own body mass. These are usually performed for about 8–15 repetitions or 10–30 seconds per hold to develop foundational strength and stability.

    Gymnastic apparatus work. Bars, parallel bars, and rings challenge coordination and body awareness. Movements are controlled and deliberate, avoiding excessive momentum.

    Light equipment and accessories. Resistance bands and medicine balls build endurance, coordination, and reaction. These tools are often used in solo or partner drills to add variety.
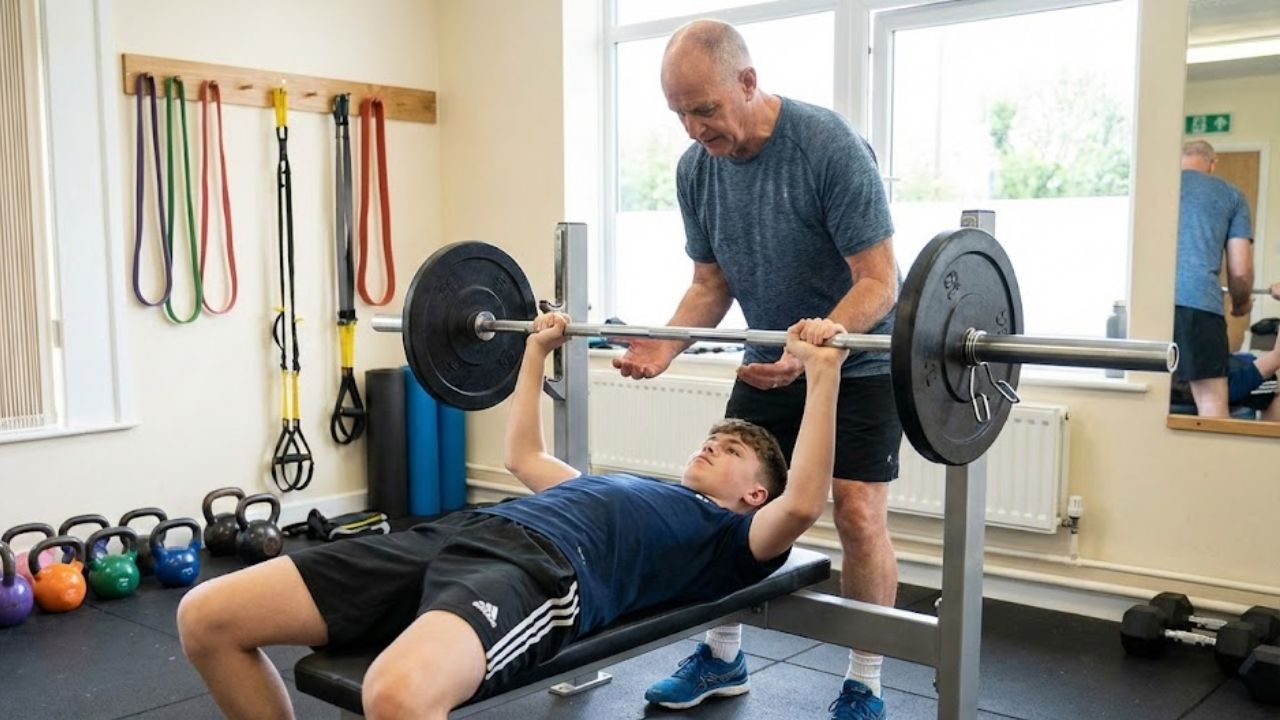
    Free weights. Dumbbells, kettlebells, and barbells are included at moderate loads. The focus remains on steady strength and muscular endurance rather than maximal lifts.
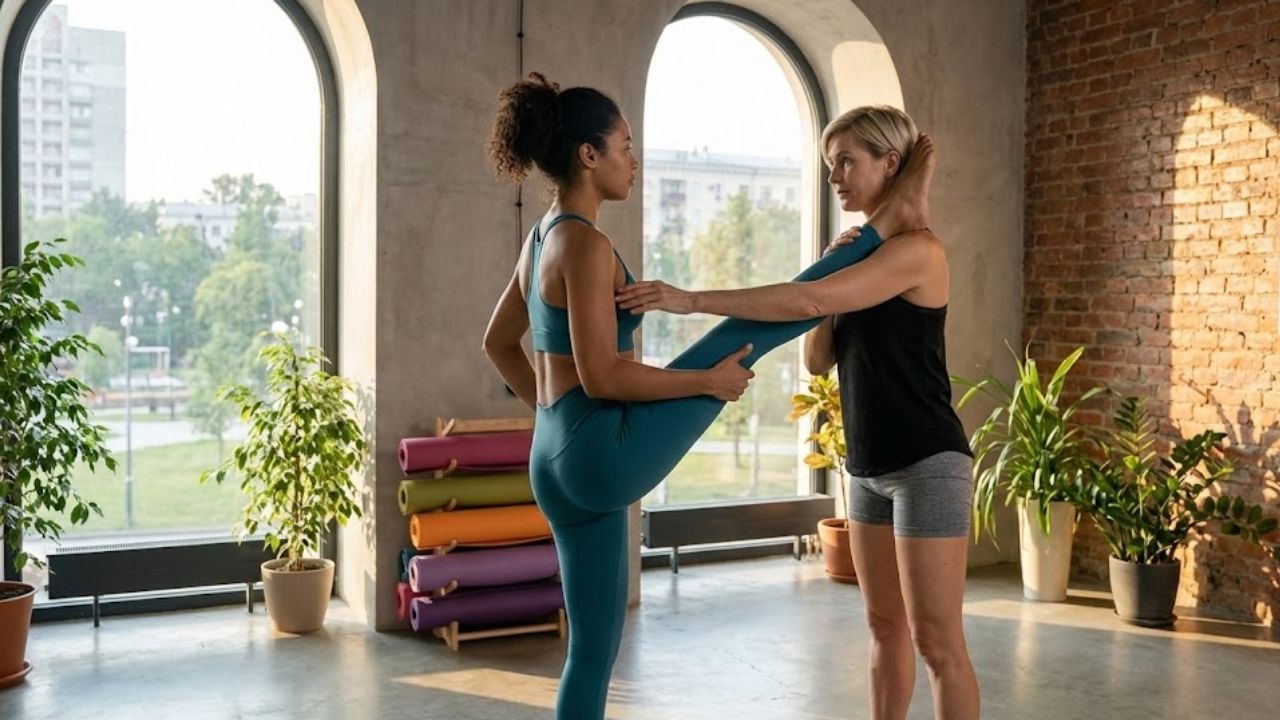
    Partner and group drills. Working with others adds unpredictable resistance, improves balance, and builds practical strength through shared movement.

    Machines. Used at a controlled pace, machines allow precise load management and help strengthen weaker areas safely, especially when stability is a priority.

    When strength becomes a skill rather than a score, training feels more engaging and sustainable.

    From personal experience, blending these elements keeps workouts interesting while protecting my joints. A mix of ring work, controlled resistance training with dumbbells, and basic bodyweight exercises gives me a strong “ready for anything” feeling. That quiet confidence from consistent strength training is far more rewarding than chasing a single record.

    How often to train and session length

    If you’re starting out, a practical plan is 2–3 sessions per week lasting around 20–30 minutes. As your body adapts, you can increase to 45–60 minutes and train a bit more frequently. The key guideline is that your final repetition should be challenging but still smooth, with solid technique and no strain.

    General fitness recommendations align well with this model: strength work for all major muscle groups on at least two days per week, along with roughly 150–300 minutes of moderate aerobic activity or a comparable mix with higher intensity cardio. Athletic gymnastics fits naturally into the strength portion of these guidelines.

    Sample weekly structure by experience level

    Experience Level Recommended Weekly Training Structure
    Beginner Train 2–3 days per week with sessions lasting around 20–30 minutes.
    Focus on full-body workouts, performing 1–2 sets per exercise to build a strong foundation and proper movement technique.
    Intermediate / Advanced Train 3–4 days per week for 45–60 minutes per session.
    Programs may include full-body or split routines, using 2–4 sets per exercise while allowing at least 48 hours of recovery between intense sessions for the same muscle groups.

    Personally, I treat the “last clean rep” as a built-in safety rule. When form starts to slip, I stop the set, even if I feel capable of pushing further.

    Recovery, sleep, and nutrition: the overlooked side of progress

    The benefits of muscle-strengthening work only show up when recovery is respected. Most adults perform best with at least seven hours of sleep per night, with many feeling optimal around 7–9 hours. Quality sleep supports coordination, energy levels, and motivation.

    Between sessions, muscles and connective tissues need time to adapt. That’s why leaving roughly 48 hours between demanding sessions for the same muscle groups is common advice. Light activity such as walking or gentle stretching on rest days helps maintain mobility without adding fatigue.

    Nutrition can stay simple. Sports nutrition guidance suggests that most active individuals do well with about 1.4–2.0 grams of protein per kilogram of bodyweight per day. Spread across meals, this often means 20–40 grams of protein per meal. Combined with adequate hydration and balanced meals, this supports regular training effectively.

    – Aim for consistent sleep, ideally 7–9 hours.

    – Alternate harder and lighter training days to protect joints and tendons.

    – Include a source of protein in each meal.

    – Use easy movement or light stretching to feel loose and recovered.

    In my experience, progress improves once recovery is treated as part of training rather than time off. When sleep, nutrition, and gentle movement are planned just like workouts, both gym performance and everyday comfort improve together.

    Why this training style supports daily life

    Athletic gymnastics builds more than visible strength. Well-structured exercise programs like this can enhance balance and movement quality, which may reduce the risk of everyday slips and falls, especially as we age. When the whole body works together efficiently, you feel steadier on stairs, more confident on uneven ground, and less fatigued by routine tasks.

    Ultimately, this approach is about developing a body you can rely on: stable joints, dependable grip strength, and calm breathing under effort. With consistent functional strength work, sensible resistance training, and attention to movement quality, training becomes part of self-care rather than a separate pursuit. That kind of strength carries over long after you step out of the gym.

  • Optical Illusion Challenge: Can You Find 7266 Hidden Among 7299s in 8 Seconds

    Optical Illusion Challenge: Can You Find 7266 Hidden Among 7299s in 8 Seconds

    Many people believe their eyes pick up everything at a glance, but optical illusion IQ puzzles are designed to challenge that idea. These visuals may appear simple, yet once you begin searching, it becomes clear how easily perception can be tricked. This number-based illusion has gained attention because it blends visual similarity with time pressure, creating a deceptively challenging mental test.

    In this puzzle, you are presented with a grid filled almost entirely with the number 7299. Hidden within the pattern is one different number: 7266. Your goal is to spot it in just eight seconds. The difference is subtle, the layout is dense, and the time limit encourages haste. Together, these elements make the challenge surprisingly difficult.

    What Defines an Optical Illusion IQ Puzzle?

    An optical illusion occurs when what you see does not fully align with reality. These puzzles take advantage of how the brain interprets shapes, repetition, and patterns. To conserve effort, the brain often relies on shortcuts instead of examining every detail closely.

    Optical illusion IQ tests use this tendency to their advantage. By displaying nearly identical numbers or shapes, they prompt the brain to assume uniformity. Once careful checking stops, the hidden difference easily goes unnoticed. This is why such puzzles are often used to test focus, attention, and visual processing speed.

    Breaking Down the 7266 Hidden Among 7299s

    At first look, the grid appears perfectly consistent. Each number seems identical, evenly spaced, and neatly arranged. Your eyes quickly accept this repeating pattern.

    The trick lies in one number that does not belong. The hidden 7266 differs only slightly from the others. Because the variation is so small, it is easy to miss, especially when racing against an eight-second timer. This challenge is less about raw intelligence and more about slowing your perception enough to notice what feels out of place.

    Why This Illusion Is More Challenging Than Expected

    The main difficulty comes from the similarity of the numbers. When scanning quickly, the brain focuses on the first digit and the overall shape. Since all the numbers start with 7 and share similar visual patterns, the brain groups them together.

    In the case of 7266, the difference appears in the final digits. While most numbers end with 99, the hidden one ends with 66. Under time pressure, the brain often skips over these last digits, assuming they match the pattern. This creates a classic case of pattern overload, where small differences become nearly invisible.

    How the Eight-Second Limit Alters Perception

    Eight seconds may sound manageable, but it feels much shorter once the timer starts. As the countdown begins, your eyes rush across the grid, often scanning row by row and trusting the brain to flag anything unusual.

    The issue is that speed reduces accuracy. As time passes, confidence grows that everything looks the same. That confidence is misleading, yet convincing, which explains why many people miss the hidden number even after several attempts.

    The Answer Made Clear

    If you did not spot 7266 within the time limit, the solution quickly clears the confusion. The hidden number appears in the tenth row and the fifth column from the left. Once you know where to look, the difference becomes obvious.

    Instead of ending in 99 like the surrounding numbers, this one ends in 66. That minor change is enough to disrupt the pattern, but only if you are paying close attention. Once revealed, the illusion loses its effect and seems almost too simple.

    What This Puzzle Shows About Concentration

    This challenge demonstrates how strongly the brain depends on expectations. When you anticipate seeing 7299 repeatedly, your perception adjusts to confirm that assumption. Anything that does not match is filtered out unless you deliberately question the pattern.

    Those who find the difference quickly tend to inspect each number more carefully. They do not rely on the pattern and instead search for inconsistencies. Missing the answer does not indicate lower ability; it simply shows the brain choosing speed over detail.

    Why Number-Based Optical Illusions Spread So Fast

    Number puzzles like this gain popularity because they feel familiar. Since numbers are part of daily life, people assume they are easy to recognize. That confidence makes the illusion even more effective.

    These challenges are also quick to share and easy to try. An eight-second test fits perfectly into short attention spans, making it ideal for social platforms where users challenge friends and return for multiple attempts.

    Simple Ways to Improve at Number Spotting Puzzles

    To perform better in similar challenges, try adjusting how you scan the grid. Instead of reading the entire number at once, focus on one digit position at a time. For example, scan only the last two digits across each row to break the brain’s pattern habit.

    Slowing down your eye movement can also help. Speed encourages assumptions, while careful observation reveals differences.

    Final Thoughts: Did You Spot 7266 in Time?

    Whether you found the hidden 7266 immediately or needed the answer revealed, this optical illusion offered a quick but effective mental workout. It tested your focus, challenged your expectations, and showed just how easily perception can be fooled.

  • Forget Sit-Ups This 8 Move Workout Builds Strong Abs More Effectively

    Forget Sit-Ups This 8 Move Workout Builds Strong Abs More Effectively

    If you are tired of sit-ups or just want an ab workout that targets your entire core, this eight-move routine from 53-year-old personal trainer and mother of two Caroline Idiens is a great option. Even better, you only need a yoga mat and a pair of light dumbbells. This type of session works well for this time of year when you might be traveling or staying with family or dealing with gym closures. Core workouts are some of the simplest strength sessions to do from home because they need very little equipment. It provides a good burn that feels satisfying. If you want an ab finisher after a gym session or just a quick workout Caroline’s eight-move routine covers everything. It has no sit-ups and is easy to follow and delivers a serious burn.

    Caroline’s Core Circuit Workout Overview

    Caroline’s circuit features eight core-focused exercises performed continuously, one after the other. Each move is done for 50 seconds, followed by a short 10-second rest before transitioning to the next exercise. This structure keeps your heart rate elevated, increases calorie burn and challenges your abdominal muscles from multiple angles.

    While the workout uses only light dumbbells and body weight, proper form is crucial. Slow, controlled movements ensure the correct muscles are activated and help prevent strain on the lower back.

    Perform each exercise for 50 seconds with 10 seconds of rest in between. Complete one full round or repeat the circuit if time and fitness level allow.

    Exercise 1: Weighted Crunch and Hip Curl

    Lie on your back with knees bent and feet lifted off the floor. Hold a dumbbell in both hands, arms straight and extended behind your head. Engage your core and lift your shoulders off the mat as you crunch your upper body toward your knees. Simultaneously curl your hips upward, drawing your knees closer to your chest. Slowly lower back down with control, keeping your abs engaged throughout.

    Expect to feel this in your deep core muscles. This slow, controlled movement builds stability without placing stress on the lower back.

    Exercise 2: Dead Bug with Dumbbell

    Lie on your back with arms extended toward the ceiling, holding dumbbells in both hands. Bend your hips and knees to 90 degrees so your shins are parallel to the floor. Brace your core and press your entire spine firmly into the mat. Slowly extend your left arm overhead while straightening your right leg away from your body. Pause just before your heel touches the floor, return to the start, then switch sides with control.

    Expect to feel this in your transverse abdominis, rectus abdominis, obliques and hip flexors.

    Exercise 3: Alternating Straight-Leg Raises

    Lie on your back holding a single dumbbell above your chest with arms straight. Press your lower back firmly into the floor and slightly tilt your pelvis. Lift your right leg to roughly 60 degrees while keeping the left leg hovering just above the mat. Lower the raised leg without touching the floor, then switch sides. Keep both legs straight and your core tight throughout.

    Expect to feel this mainly in your obliques, the muscles running along the sides of your waist.

    Exercise 4: Seated Russian Twist

    Sit on the floor with knees bent and feet flat. Hold a dumbbell in both hands and lean back until your torso forms approximately a 45-degree angle. Lift your feet off the floor, creating a V-shape with your body while keeping knees bent. Holding the dumbbell in front of your chest, rotate your torso to one side, then through the center to the opposite side. Maintain a long spine and keep your legs as still as possible.

    Expect to feel this in your superficial core muscles, particularly the rectus abdominis, along with a gentle hamstring stretch.

    Exercise 5: Toe Reach

    Lie on your back with arms by your sides, palms facing down. Slowly straighten your legs so they point straight up above your hips. Reach your right hand upward as you exhale, lifting your shoulders off the mat toward your toes. Inhale as you lower with control. Alternate hands, keeping your core engaged and movements steady.

    Expect to feel this in your upper abs and hamstrings.

    Exercise 6: Low Plank Knee Taps

    Hold a low plank position on your elbows with your core braced and belly button drawn toward your spine. Without shifting your torso or hips, lower one knee to lightly tap the floor, then lift it back to plank. Alternate sides slowly, maintaining full-body tension throughout the movement.

    Expect to feel this in your abs, shoulders and quads. Keeping hips level is key to maximum core engagement.

    Exercise 7: Jackknife

    Lie on your back with arms extended overhead. Brace your core and lift your legs off the mat, drawing them upward toward the ceiling. At the same time, bring your arms forward and lift your head, shoulders and upper back to meet your legs. Slowly reverse the movement to return to the starting position.

    Expect to feel this in your rectus abdominis and deep transverse abdominis. This advanced movement also engages the hip flexors.

    Exercise 8: Plank Pass

    Start in a high plank position with hands gripping a pair of dumbbells directly under your shoulders. Engage your core and glutes to form a straight line from head to heels. Lift one dumbbell with your right hand and pass it underneath your body to the left side. Place it down, then use your left hand to pass the other dumbbell back to the right. Continue alternating, keeping hips stable and minimizing rotation.

    Expect to feel this in your shoulders, obliques and core as it challenges stability and coordination.

    Beginner Modifications

    If you are new to core training, extend rest periods or reduce work intervals to 30–40 seconds. The focus should always be on proper form and controlled execution rather than speed.

    Why This Abs Routine Is Effective

    While sit-ups can be useful, a strong and functional core requires variety. This workout targets deep stabilizing muscles responsible for posture and spinal support, including obliques for rotational control, rectus abdominis for visible strength and lower abs for pelvic stability.

    By combining dynamic movements like dead bugs with stabilization exercises such as plank knee taps, the routine effectively challenges the entire core. As Caroline explains, building core strength is essential for balance, posture and everyday functional movement.

    Does This Workout Build Visible Abs?

    Visible abs don’t come from workouts alone. Sustainable results require a balanced approach that includes a nourishing diet, consistent physical activity, quality sleep and stress management. Consistency remains the most important factor.

    Caroline emphasizes that once exercise becomes a habit, long-term results follow naturally.

    Additional Training Recommendations

    If time allows, adding compound exercises such as squats, overhead presses and deadlifts can further enhance strength. These movements support bone health and help preserve muscle mass as we age.

    Caroline notes that muscle loss can begin around age 35, making resistance training vital for muscles, bones, brain function and heart health. Short, functional at-home workouts can be just as effective as long gym sessions when performed consistently.

  • 7 Yoga Poses That Support Natural Immunity and Daily Energy

    7 Yoga Poses That Support Natural Immunity and Daily Energy

    A strong immune system is essential for staying healthy and protecting the body from frequent illnesses. While balanced nutrition and quality sleep are important, physical activity—especially yoga—plays a powerful role in supporting immunity. Yoga helps lower stress, improve blood circulation, and stimulate the lymphatic system, which removes toxins and supports immune defence. Below is a rewritten guide to seven effective yoga poses that help strengthen immunity and promote overall wellness throughout the year.

    Why Yoga Is Effective for Immunity

    Yoga is an ancient wellness practice that blends mindful movement, controlled breathing, and mental focus. Regular yoga practice activates the lymphatic system, allowing the body to flush out waste and harmful pathogens more efficiently. Yoga also reduces cortisol levels, the stress hormone that weakens immune response when elevated for long periods. By improving circulation, oxygen delivery, and reducing inflammation, yoga creates the ideal internal environment for a strong and balanced immune system.

    Downward Facing Dog (Adho Mukha Svanasana)

    Downward Facing Dog is highly effective for stimulating the lymphatic system and promoting detoxification. Begin in a tabletop position, then lift your hips upward to form an inverted V shape. Press your palms firmly into the mat, keep your spine long, and allow your head to relax between your arms. Hold the pose for 30 seconds or longer. This inversion improves blood flow, activates lymph nodes, and enhances immune efficiency.

    Child’s Pose (Balasana)

    Child’s Pose is a deeply restorative posture that promotes relaxation and stress relief—both essential for immune health. Kneel on the mat, bring your toes together, and gently lower your torso forward, resting your forehead on the ground. Extend your arms or place them beside your body. Breathe slowly and deeply for 1–2 minutes. This calming pose resets the nervous system and supports immune balance.

    Warrior II (Virabhadrasana II)

    Warrior II strengthens the body while improving focus and reducing stress. Stand with your feet wide apart, bend the front knee to 90 degrees, and extend both arms parallel to the floor. Keep your gaze steady over the front hand and breathe deeply. Hold for 30 seconds on each side. This pose builds physical strength and encourages deep breathing, helping the immune system function efficiently.

    Bridge Pose (Setu Bandhasana)

    Bridge Pose opens the chest, improves circulation, and stimulates the thymus gland, which plays a key role in immune function. Lie on your back with knees bent and feet grounded. Press through your feet to lift your hips while keeping your shoulders relaxed. Hold the pose for 20–30 seconds. This posture enhances oxygen flow and supports immune regulation.

    Cobra Pose (Bhujangasana)

    Cobra Pose strengthens the spine and expands the lungs, improving oxygen intake and respiratory health. Lie on your stomach, place your hands under your shoulders, and gently lift your chest while inhaling. Keep elbows slightly bent and avoid straining the lower back. Hold for up to 30 seconds. Improved lung function supports better oxygen circulation, which is essential for immune defence.

    Legs Up the Wall (Viparita Karani)

    Legs Up the Wall is a restorative inversion that supports lymphatic drainage and stress relief. Lie on your back with legs extended vertically against a wall, arms relaxed by your sides. Close your eyes and breathe deeply for 5–10 minutes. This pose reduces inflammation, supports detoxification, and calms the nervous system, strengthening immunity naturally.

    Seated Forward Fold (Paschimottanasana)

    Seated Forward Fold calms the mind and supports healthy digestion, both of which influence immune health. Sit with legs extended, inhale to lengthen your spine, and exhale as you fold forward from the hips. Hold for 30–60 seconds while breathing steadily. This pose relieves tension, improves digestion, and promotes internal balance.

    Helpful Tips to Boost Immunity With Yoga

    Practice yoga consistently for 20–30 minutes daily to see long-term benefits. Focus on deep breathing to activate the relaxation response. Stay well hydrated after practice to support detoxification. Including short meditation sessions can further reduce stress and strengthen immune resilience.

  • 12 Yoga Exercises That Build Core Strength and Improve Stability

    12 Yoga Exercises That Build Core Strength and Improve Stability

    A strong core is the foundation of a healthy and balanced body. It not only supports better posture but also improves balance, flexibility, and overall physical performance. Yoga is one of the most effective ways to build core strength because many poses naturally engage the abdominal muscles, lower back, and pelvic region. Below are the top 12 yoga exercises that focus specifically on strengthening the core, with clear explanations to help improve stability and total fitness.

    Why Core Strength Is Important

    The core muscles include the abdominals, lower back, hips, and pelvic floor. These muscles stabilize the spine and support nearly every movement of the body. A strong core helps prevent injuries, improves posture, and boosts performance in activities like running, lifting, and daily movements. Strong core strength also enhances balance and coordination, making everyday tasks easier and more efficient.

    Boat Pose (Navasana)

    Boat Pose is one of the most effective yoga poses for strengthening the abdominal muscles and hip flexors. Sit on the floor with knees bent and feet flat. Lean back slightly with a straight spine, lift your feet, and balance on your sit bones. Extend your arms forward and straighten your legs if possible. Hold for 20–30 seconds. This pose builds strong abs and improves balance.

    Plank Pose (Phalakasana)

    Plank Pose is a powerful full-body exercise that strongly targets the core. Begin in a push-up position with hands under shoulders and body in a straight line. Engage your abs, glutes, and thighs. Hold for 30–60 seconds without letting hips sag. This pose improves endurance and strengthens muscles that support the spine.

    Side Plank (Vasisthasana)

    Side Plank mainly targets the oblique muscles along with arms and shoulders. From plank, rotate your body to one side, stacking your feet and lifting your top arm upward. Keep the body aligned and core tight. Hold 20–30 seconds on each side to improve side stability and core control.

    Cobra Pose (Bhujangasana)

    Cobra Pose strengthens the lower back while engaging the abdominal muscles. Lie face down with hands under shoulders. Press into palms and lift the chest while keeping the lower body grounded. Engage the core to protect the lower back. Hold for 20–30 seconds to build spinal and core strength.

    Dolphin Pose (Ardha Pincha Mayurasana)

    Dolphin Pose activates the core, shoulders, and arms. Begin on forearms and knees, then lift hips upward to form an inverted V shape. Press forearms firmly into the mat and keep the core engaged. Hold for 30 seconds. This pose improves core strength and shoulder stability.

    Warrior III (Virabhadrasana III)

    Warrior III is a balance-focused pose that requires strong core engagement. Shift weight onto one leg while extending the other leg backward. Keep your torso parallel to the floor and arms extended forward. Hold for 20–30 seconds on each side to enhance balance and core control.

    Reverse Tabletop Pose (Ardha Purvottanasana)

    Reverse Tabletop strengthens the core, glutes, and arms. Sit with legs extended and hands behind you. Press into hands and feet to lift hips upward. Keep shoulders and hips aligned and core tight. Hold for 20–30 seconds for full-body strength.

    High Plank to Low Plank (Chaturanga Dandasana)

    Chaturanga builds endurance and deep core strength. From high plank, lower halfway down with elbows close to ribs. Keep the core engaged and body aligned. Push back up to plank and repeat 5–10 times to strengthen arms, shoulders, and abs.

    Locust Pose (Salabhasana)

    Locust Pose targets the lower back, glutes, and core muscles. Lie face down and lift chest, arms, and legs off the floor. Keep the core tight and legs active. Hold for 20–30 seconds to improve posture and spinal support.

    Crow Pose (Bakasana)

    Crow Pose is an advanced arm balance that demands strong core activation. From a squat, place hands on the mat and shift weight forward. Lift feet off the ground while keeping knees close to arms. Hold for 10–15 seconds to build core and arm strength.

    Superman Pose (Viparita Shalabhasana)

    Superman Pose strengthens the entire core and back. Lie face down with arms stretched forward. Lift arms, chest, and legs together while engaging the core. Hold for 20–30 seconds to support spinal stability and posture.

    Extended Side Angle (Utthita Parsvakonasana)

    Extended Side Angle activates the obliques and strengthens the full core. From Warrior II, bend the front knee and extend the torso sideways. Stretch the top arm overhead to create length. Hold for 30–60 seconds on each side to improve strength and flexibility.

  • Repair Wood Floor Scratches Easily Using Simple Home Techniques

    Repair Wood Floor Scratches Easily Using Simple Home Techniques

    The first time you see it you almost think you imagined it. A pale raw line cuts across the warm wood floor you have loved for years. It might have come from a chair leg pushed too hard or from your dog’s nails scratching the surface during playful runs around the room. Maybe it happened when you dragged a plant stand instead of lifting it properly. The house feels quiet but the scratch seems loud like someone shouting in your living room. When you run your fingers over it the rough edge catches your skin just enough to remind you that this beautiful floor is not indestructible. This soft golden surface made of planks & knots & years of memories can be damaged. Now you wonder if you have ruined it completely. You start thinking this might be one of those problems that needs a professional to fix. You imagine a weekend filled with sanding dust and a repair bill you would rather avoid.

    The Hidden Language of Floor Scratches: What Your Eyes Are Really Noticing

    Before you do anything else, you lean in closer. There’s a faint scent of old polish mixed with last weekend’s cleaning soap. You shift your head slightly, letting the light fall at a different angle. That’s when the truth becomes clear: every scratch on a wooden floor tells a different story.

    Some marks are barely there—soft, pale lines that look dramatic but sit only in the finish. They haven’t harmed the wood beneath. Others are heavier, darker grooves that sink into the grain itself. Those deeper scratches usually come from furniture dragged instead of lifted, or grit trapped under weight, slowly grinding its way down.

    Run your fingernail gently across the mark. If it barely catches, it’s a surface scratch. If it hooks and resists, the damage goes deeper. Learning this difference is like learning how your floor speaks. Once you understand it, the repair process feels far less intimidating—and surprisingly manageable at home.

    Light Surface Scratches: Small Marks That Need Gentle Attention

    Fine scratches don’t require power tools or major effort. They respond best to subtle care—cleaning, warmth, and restored color rather than force.

    Start by cleaning the area. Dust and grit exaggerate scratches, making them appear worse than they are. Use a soft cloth with a mild, wood-safe cleaner. As the surface darkens slightly with moisture, the scratch often fades. That brief disappearance shows you how good the result can be.

    Next comes restoring color. A wood repair marker, blending pencil, or even a matching wax crayon works well. Draw lightly along the scratch, following the direction of the grain. Wipe away the excess with a soft cloth. The scratch won’t completely vanish, but it will soften and blend, becoming part of the floor rather than a distraction.

    Simple Kitchen Fixes: Walnuts, Tea, and Old-School Solutions

    Some of the most effective scratch fixes don’t come from a toolbox—they come from the kitchen. These methods feel old-fashioned, but they work because they nourish and tint the wood gently.

    Rubbing the meat of a walnut over a light scratch releases natural oils into the dry fibers. The wood darkens slightly, the harsh white line fades, and the surface looks calmer. After buffing with a cloth, many shallow scratches become barely noticeable.

    For darker floors, brewed black tea acts like a mild stain. Dip a cotton swab into cooled tea and dab it onto the scratch. Let it sit briefly, then wipe away the excess. Repeat until the color blends. These methods don’t erase damage; they soften it, allowing the scratch to merge into the natural variation of the wood.

    Deep Scratches and Gouges: When Real Repair Is Needed

    Some scratches go beyond surface fixes. Gouges, pale cuts, and deep grooves won’t respond to oils or color alone. These require rebuilding what was lost.

    Begin with thorough cleaning and allow the wood to dry completely. Then choose a wood filler or wax stick that closely matches the floor’s tone. Color selection matters—wood carries layers of warmth and undertone, not just “brown.”

    Press the filler firmly into the scratch using a plastic scraper or old card. Remove excess material so it sits flush with the surface. Once dry, lightly buff. If the floor has a sheen, apply a thin layer of matching finish to restore consistency. The goal isn’t perfection—it’s harmony with the surrounding boards.

    Blending the Repair: Matching Light, Grain, and Texture

    A scratch becomes noticeable because it interrupts the flow of the floor. Repairing it is about restoring that visual rhythm.

    View the area from different angles and under different lighting. If the repair looks too light, deepen it slightly with a marker. If it’s too dark, soften it gently with very fine steel wool. Always follow the grain.

    You can even mimic grain lines with a blending pencil, drawing faint streaks to match the board’s natural pattern. Step away and return with fresh eyes. Most repairs improve simply by giving them time to settle and letting your perception reset.

    Buffing and Polishing: Helping the Repair Disappear Naturally

    Once a scratch is fixed, a light overall polish helps it blend seamlessly into the floor. This doesn’t require heavy machinery—just a microfiber mop and a wood-safe polish.

    Apply a thin, even layer, working with the grain. The floor regains a soft, natural glow rather than an artificial shine. As the entire surface refreshes, individual repairs fade into the background, becoming part of a cared-for whole instead of isolated flaws.

    Daily Habits That Prevent New Scratches

    Prevention doesn’t mean restriction. It means small, thoughtful habits that protect the floor without changing how you live.

    Use felt pads under furniture legs, place rugs in high-traffic areas, remove heavy shoes at the door, and sweep regularly to remove grit. These simple actions reduce wear quietly, allowing the floor to age gracefully rather than abruptly.

    Scratch Category How It Appears or Feels Recommended Easy Repair
    Light surface scuffs Hard to notice unless under bright light, fingernail slides smoothly Wipe the area clean, then apply wood polish, a walnut rub, or a gentle floor refresher
    Minor white or grey lines Thin visible scratch, fingernail slightly catches Clean thoroughly, use a matching wood marker or wax crayon, then buff to blend
    Deep scratches or gouges Obvious indentation, rough feel, nail catches firmly Clean the spot, fill with wood filler or wax stick, color-match, and seal if required
    Dull high-traffic wear Finish looks faded or scuffed, no deep cuts Clean well, lightly buff the surface, then apply a floor polish or rejuvenating product
    Concentrated deep damage Several scratches grouped together, uneven and rough texture Spot sand and refinish the area, or seek professional repair for a seamless result

    Living With a Floor That Carries Your Story

    Over time, a wooden floor becomes more than a surface. It records movement, memory, and daily life. Repairing scratches isn’t about erasing those moments—it’s about choosing which marks remain and which ones soften into the background.

    With patience, simple tools, and attention, you learn that wood is resilient. Each repair strengthens your connection to the space you live in. You’re not just fixing scratches—you’re maintaining the quiet foundation that supports everyday life, step after step.

  • Optical Illusion Challenge: Can You Find the Hidden 623 Before Time Runs Out?

    Optical Illusion Challenge: Can You Find the Hidden 623 Before Time Runs Out?

    Are you confident in your observation skills? The Optical Illusion 7 Seconds Challenge has been gaining attention online because it pushes your eyes and brain to work together under pressure. In this challenge viewers are asked to find the number 623 hidden among nearly identical numbers within just seven seconds. It sounds simple but many people fail on their first attempt. Optical illusion puzzles like this are more than casual entertainment. They test how quickly your brain can process visual information & spot small inconsistencies while staying focused when time is limited. If you enjoy quick mental challenges this one is worth trying.

    What Makes the 7 Seconds Challenge So Tricky?

    At first the image looks the same throughout. Similar numbers appear in rows across the screen and form a pattern that seems repetitive and easy to predict. This is how the illusion works. Your brain enjoys patterns & assumes everything is the same once it finds one. The number 623 hides among a group of nearly identical numbers that are usually 628. The difference is small and your eyes might miss it when the numbers repeat many times. The seven second timer makes things harder because it stops you from slowing down to check each number with care.

    Why Optical Illusions Confuse the Brain

    Optical illusions work because the human brain values speed more than accuracy. When you look at repeating shapes or numbers your brain takes shortcuts to handle the information quickly. This strategy works well in daily life but causes problems when solving visual puzzles. The illusion depends on overwhelming your vision. Your eyes move fast across the image so small differences like an altered digit shape or curve often go unnoticed. People who pay close attention to details or regularly work with visual puzzles usually do better at these challenges. They have learned to think more slowly and carefully even when time pressure exists.

    How to Spot the Hidden 623 Faster

    If you had trouble spotting the number on your first attempt, many others did too. A few basic strategies can help you do better next time. A good approach is to check the image one section at a time instead of looking everywhere at once. Examine each row separately rather than letting your vision bounce around randomly. You can also search for what makes 623 stand out from the rest. Rather than reading complete numbers concentrate on the final digit. This method helps your brain detect the difference faster. Keeping your composure is important as well. Feeling stressed or moving too quickly usually causes errors. Even when you only have seven seconds, a careful & methodical search works better than desperate hunting.

    Why These Challenges Are Going Viral

    Optical illusion challenges have gained massive popularity across social media platforms because they are quick to complete and easy to share with others. People like testing their observation skills & then comparing their performance with friends and family members. These puzzles have become so widespread partly because they offer a genuine sense of achievement. Finding the hidden number before time runs out feels satisfying & rewarding when you know that many other people struggled with the same challenge. The puzzles also tap into natural human curiosity. Even when you fail to spot the answer in time you usually feel motivated to try again so you can discover what you missed the first time around.

    What Your Result Says About You

    These challenges are not scientific tests but they can show interesting things about how you process information. Finding the number 623 quickly may suggest strong visual scanning skills and good focus under pressure. Taking more time does not mean poor eyesight. It often shows that your brain prefers accuracy over speed. Many people get better with practice. Doing optical illusion puzzles regularly can improve attention to detail and visual memory over time. That is why these challenges are often recommended as light brain exercises.

    Solution to the Optical Illusion 7 Seconds Challenge

    If you could not locate the hidden number here is what you need to know. The number 623 sits within many copies of 628 and forms an almost matching pattern. The key difference is in the last digit. The number 3 has a different curve than the number 8 but this detail is hard to notice when everything looks the same. In most cases the number 623 shows up close to the middle of the grid. When you finally know its location it seems clear and this is a typical feature of optical illusions. The solution appears simple only after someone points it out.

    Keep Testing Your Observation Skills

    Optical illusion puzzles offer an easy method to exercise your mind without needing any equipment beyond your attention and interest. These challenges work well whether you found the number 623 right away or took longer to locate it because every try strengthens your ability to catch small details. Anyone who liked this puzzle should explore similar games that ask you to find concealed letters or numbers or identify differences before time runs out. These activities provide entertainment while keeping your brain active & often become quite engaging. When someone next mentions having sharp vision you will know exactly which test to use to check if they really do.

  • Brain Teaser Challenge: Spot 3 Differences in the Fox Images Within 9 Seconds

    Brain Teaser Challenge: Spot 3 Differences in the Fox Images Within 9 Seconds

    Brain teaser challenges keep getting more popular because they combine entertainment with mental training. When you first see the puzzle it looks simple but everything changes once the clock begins ticking. This visual brain teaser asks you to find three differences between two similar pictures of a fox in only nine seconds. The images show a detailed fox scene with natural elements like leaves and fur textures along with subtle background details. Both pictures look identical at first glance. However there are small changes hidden in them that test how well your eyes & brain cooperate when time is limited.

    Why Spot the Difference Brain Teasers Are So Engaging

    Spot the Difference puzzles activate a part of the brain that constantly compares visual information. In daily life, this ability helps people notice small changes in their surroundings. In these puzzles, that same skill is tested more intensely, making the experience mentally stimulating.

    The challenge becomes engaging because the brain expects both images to be identical. Once it assumes consistency, it relaxes and stops searching carefully. These puzzles take advantage of that habit by hiding differences in unexpected places. When a hidden change is finally spotted, it creates a strong sense of reward and satisfaction.

    Another reason these teasers are so popular is their simplicity. They require no special rules or prior knowledge. Anyone, regardless of age, can enjoy them by simply observing, comparing, and reacting quickly.

    What Makes the Fox Puzzle Especially Tricky

    The fox puzzle is visually rich, which adds to its difficulty. The detailed artwork naturally draws attention to the fox itself, often distracting the viewer from the surrounding environment where differences may be hidden.

    Small changes in texture, shape, or position blend smoothly into the scene. Because these differences are subtle rather than obvious, they demand careful observation instead of quick guesses. The nine-second time limit increases the pressure, making it even easier to overlook minor details.

    How Time Pressure Impacts Visual Thinking

    Time limits significantly affect how the brain processes visual information. With only nine seconds available, the brain switches to a rapid scanning mode instead of slow, detailed comparison.

    This approach works well for bold differences but fails when changes are subtle. In this puzzle, rushed scanning often leads to missed details. People who perform better usually remain calm and divide the image into sections rather than scanning randomly across the picture.

    Smart Strategies to Spot Differences Faster

    Using the right strategy can greatly improve success in Spot the Difference puzzles. One effective method is to scan the image systematically. Starting from the top left and moving across each section reduces the chance of missing hidden changes.

    Focusing on areas that are easy to alter, such as facial features, background objects, or small environmental elements, can also help. Designers often hide differences in places that appear unimportant at first glance.

    Edges and corners are frequently overlooked during fast scans, so comparing these areas carefully can reveal changes that others miss.

    Solution Explained in Simple Terms

    If you were unable to find all three differences within the time limit, here is a clear explanation of the solution.

    The first difference is located in the fox’s eye. In one image, the eye shape is slightly different from the other. This change is very subtle and easy to miss unless you focus closely on the fox’s face.

    The second difference appears near the fox’s paws. In one image, small water droplets are visible on the ground, while in the other image, those droplets are missing. Because this detail blends into the natural setting, it is difficult to notice quickly.

    The third difference is found in the top left corner of the image. The arrangement of leaves in that area is slightly different between the two pictures. Once noticed, the change becomes obvious.

    What Your Performance Says About You

    Finding all three differences within nine seconds indicates strong attention to detail and efficient visual processing. It suggests that your brain can remain focused even under time pressure.

    Missing one or more differences does not indicate poor ability. Many people naturally prioritize accuracy over speed, and with more time, they often identify every change easily.

    These puzzles highlight different thinking styles rather than serving as strict measures of intelligence.

    Benefits of Solving Visual Brain Teasers

    Regularly solving visual brain teasers can help improve concentration, visual memory, and pattern recognition. They encourage the brain to slow down and question first impressions instead of relying on assumptions.

    Many people also find these puzzles relaxing. They provide a short mental break that feels productive without being overwhelming.

    With consistent practice, both speed and accuracy in visual tasks can improve over time.

    Why These Puzzles Remain Popular Today

    In a world filled with constant distractions, brain teasers offer a focused and engaging challenge. They are easy to share, enjoyable to discuss with others, and provide instant mental stimulation.

    The fox-themed puzzle adds visual charm and a natural setting, making the experience enjoyable rather than stressful. This balance helps maintain long-term interest.

    Keep Challenging Your Observation Skills

    The fox picture brain teaser reminds us that small details can easily go unnoticed. Images that appear identical at first glance often hide clever differences waiting to be discovered.

    If you enjoyed this challenge, try exploring more Spot the Difference puzzles with different themes and time limits. Each new puzzle helps sharpen observation skills and build confidence. With practice, noticing subtle changes can become second nature.

  • Optical Illusion Challenge: Locate 6226 Among 6262s Within 7 Seconds

    Optical Illusion Challenge: Locate 6226 Among 6262s Within 7 Seconds

    Optical illusions offer an excellent method to train your brain and improve how well you observe things. The challenge today is both entertaining and difficult. You need to find the number 6226 hidden among many 6262s within only 7 seconds. This is a timed challenge that will test how well you can focus and pay attention. This type of puzzle requires you to scan quickly through similar looking numbers while staying alert for the one that differs. The numbers 6226 & 6262 look very similar at first glance which makes this task harder than it seems. Your eyes must move rapidly across the image while your brain processes each number to spot the correct one. Most people find this challenge difficult because the human brain tends to see patterns and can easily skip over small differences. When you look at rows of nearly identical numbers your mind may automatically fill in what it expects to see rather than what is actually there. This is why these visual puzzles work so well as brain exercises.

    How to Approach This Optical Illusion Challenge

    Mastering this optical illusion depends entirely on sharp attention to detail. At first glance, all the numbers may look identical, but with careful observation, you can identify the hidden 6226 among the 6262s. A calm and focused approach will significantly improve your chances of spotting the difference within the given time.

    Scan Methodically: Begin from one corner of the image and move your eyes steadily across each row. This structured scanning technique ensures that no area is skipped and reduces the risk of missing the odd number.

    Look for Subtle Differences: Concentrate on the small variations in digit arrangement. The 6226 has a slight structural difference that becomes noticeable once your eyes adjust to the pattern.

    Use the Time Wisely: With only 7 seconds available, staying composed is crucial. Avoid rushing, as panic can cause you to overlook key visual details. A steady pace often leads to quicker success.

    Why Are Optical Illusion Challenges Popular?

    Optical illusion challenges are more than simple entertainment. They actively stimulate the brain and help enhance mental abilities such as focus, memory, and analytical thinking. Regular engagement with these puzzles can sharpen your observation skills and improve how your brain processes visual information.

    Additionally, these challenges encourage critical thinking and offer a refreshing mental break from daily routines. They are an enjoyable way to exercise the mind while reducing stress.

    How Can You Spot the 6226 Among 6262s?

    Spotting the 6226 among the repeated 6262s requires close attention to number placement and sequence. The key lies in recognizing the slight change in digit order that breaks the visual pattern.

    Shifting your focus periodically rather than staring at a single spot can also help. This allows your brain to reset and detect differences more efficiently when you look again.

    The Solution

    If you’ve examined the image carefully, you may have already found the 6226. It is usually located near the center or slightly toward the right side of the image. If you didn’t spot it this time, don’t be discouraged.

    Consistent practice with optical illusion challenges improves your speed and accuracy. Over time, recognizing patterns and spotting anomalies will become much easier.

  • Too Much Sitting Over Christmas Harms Health Try These 5 Simple Exercises to Reverse It

    Too Much Sitting Over Christmas Harms Health Try These 5 Simple Exercises to Reverse It

    Stay Active This Christmas Season The holiday season brings endless desserts festive movies and comfortable couch dinners. Christmas naturally encourages us to be less active. However sitting too much damages your health regardless of the season and the holidays are particularly risky since our eating habits often deteriorate as well. Dr Sarah Jarvis from GH explains that people easily spend extended periods sitting while working at computers or watching television or using their phones. A 2024 study examined nearly half a million people and found that those who sit most of the day at work face over 30 percent higher risk of dying from heart attack or stroke. They also have significantly higher chances of early death overall.

    These results remained consistent even after researchers accounted for other factors like sex and age & smoking & drinking & weight. The Christmas period makes staying healthy & fit more challenging than usual. Personal trainer Kim Hawley who works as a senior sleep and wellness tester at GHI notes that health & fitness and mental wellbeing always get neglected during Christmas. She emphasizes that any amount of activity helps. Kim suggests adding simple exercises to your daily routine by connecting them with regular activities. She calls these Christmas Cues and points out that they require no gym equipment or special workout clothes. These small movements need minimal effort but provide a substantial energy boost during the holidays. Staying active does not need to become another task on your already busy list. ## Stair Climbing Exercise Take stairs two steps at a time whenever you go upstairs.

    You get extra benefits if you carry something while doing this.