Author: admin

  • No Vinegar No Baking Soda This Clever Trick Lifts Deep Car Seat Stains Fast

    No Vinegar No Baking Soda This Clever Trick Lifts Deep Car Seat Stains Fast

    There’s that faint blend of stale coffee, fast-food fries, and something you can’t quite place. Sunlight cuts across the seat, and all the marks you’ve been avoiding instantly stand out: a muddy footprint, a melting ice-cream ring, a takeaway spill from days ago. You instinctively rub one with your sleeve. It doesn’t disappear. It spreads.

    Your mind jumps to the usual advice: bowls of vinegar, baking soda everywhere, a weekend sacrificed to home-made cleaning experiments. You already know it won’t happen. The car stays slightly sticky, mildly embarrassing, forever parked on your mental to-do list.

    Then, at a petrol station, someone wipes their seat with a quick spray. No vinegar. No baking soda. The stain vanishes as if it never existed. You watch closely. It feels like cheating.

    No vinegar, no baking soda: why car seats still look permanently dirty

    Most people obsess over the outside of their car while quietly tolerating the inside. The paint gleams, but the seats tell another story. Fabric upholstery absorbs everything: coffee, sweat, sunscreen, fizzy drinks, leaking shopping bags. A quick vacuum helps, but it doesn’t touch those lingering shadows.

    The result is an interior that always feels slightly worn, even in a relatively new vehicle. Light-coloured seats suffer most. Every spill becomes a small crime scene, sinking into the fibres. A damp cloth makes it fade, then the mark returns the moment it dries.

    The truth is simple. Most car seat stains aren’t permanent or mysterious. They’re layers of oil, sugar, pigment, and dust clinging together. Once you understand that, vinegar and baking soda start to feel like loud solutions to a quiet problem.

    A UK valeting survey found that interior stains ranked among the top three reasons people booked a full detail. Not dents. Not scratches. Just seats they couldn’t tolerate anymore. On average, they lived with those stains for almost a full year before giving up.

    You can picture the scenes easily: the family car with an orange juice spill under the child seat, the rideshare back seat dotted with makeup and lipstick marks, the commuter whose breakfast-on-the-go left a scatter of coffee stains.

    One weekday morning, a detailer handled exactly those disasters in under fifteen minutes. No buckets. No sharp vinegar smell. He sprayed a clear solution, worked it in gently, then extracted it with a compact wet vacuum. Each stain darkened, foamed lightly, and disappeared. The owners looked impressed — and slightly annoyed they hadn’t tried this sooner.

    Here’s the practical part. Most car seats are made from synthetic fibres, often polyester blends with protective coatings. Stains sit on and between those fibres, held by oils and fine particles. Vinegar and baking soda can help, but they’re blunt tools and often leave sticky residue that attracts new dirt.

    • Interior stains remain a leading reason for professional detailing bookings.
    • Most marks persist because residue pulls fresh grime back in.
    • Light upholstery shows damage faster and more visibly.

    Modern upholstery cleaners use surfactants and mild solvents designed specifically for these materials. They break the bond between stain and fabric, keeping the dirt suspended so it can be lifted out instead of smeared around. The key isn’t scrubbing harder. It’s dissolving smarter.

    When you stop treating seats like kitchen counters and start seeing them as technical textiles, the job changes completely. Cleaning becomes a simple process: spray, work in, extract. No lingering odour. No guesswork.

    The real trick: a simple two-product method that actually works

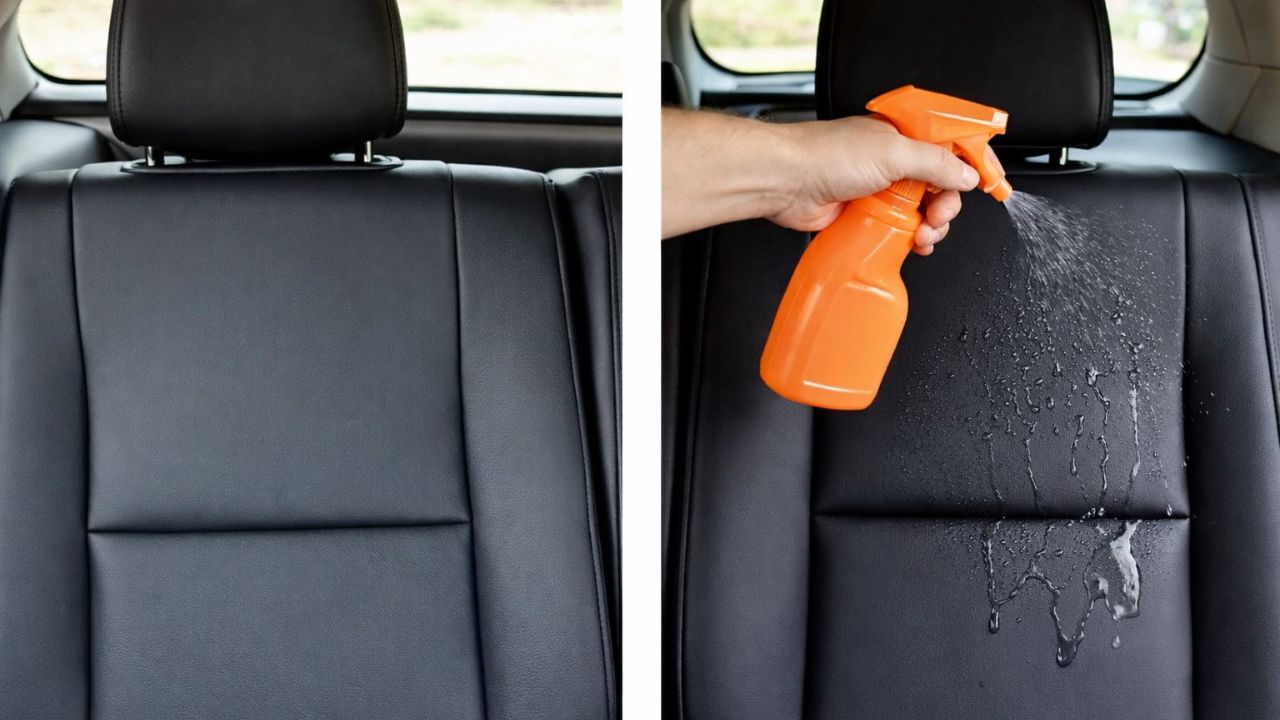
    The approach that quietly outperforms most home remedies starts with something basic: a dedicated fabric upholstery cleaner and a damp microfibre cloth. A small wet/dry vacuum improves results, but it isn’t essential.

    Start by vacuuming the seats thoroughly so loose grit isn’t pushed deeper. Lightly mist the stained area — do not soak it. Let the cleaner sit for two to three minutes. Using a soft brush or clean cloth, work in small circular motions. You’re encouraging the dirt to release, not attacking the fabric.

    Wipe with a clean, slightly damp cloth to lift the loosened residue. If you have a wet vacuum, extract the area to pull out the dirty solution. Older stains may need a second pass. Let the seat air-dry naturally with the windows cracked open.

    The method is simple, but people often overdo it. Too much product leaves seats damp for days. Stiff brushes raise the fabric, creating clean patches that look worse than the original stain.

    On a busy street in Leeds, a father tried removing melted chocolate with baby wipes. The stain spread, the foam grew, frustration followed. A nearby detailer stepped in, applied the right cleaner, brushed lightly, and extracted a stream of cloudy water. The result was instant. Using the right tool once beat using the wrong one ten times.

    Soyons honnêtes : nobody cleans car seats daily. It happens after a major spill or when an old smell resurfaces. The key is avoiding three mistakes: boiling water, aggressive scrubbing, and mixing random household chemicals.

    “I stopped using vinegar when my car smelled like a chip shop,” laughs Sarah, a 34-year-old teacher with a long commute. “Now I keep one proper upholstery cleaner in the boot. Spills happen, but they don’t have to stay.”

    That single bottle in the boot makes a difference. A small kit — cleaner, soft brush, two microfibres — turns fuel stops into chances to erase fresh messes before they set.

    • Fabric seats: water-based upholstery cleaner, soft brush, light pressure, optional wet vac.
    • Leather or faux leather: dedicated leather cleaner and conditioner, no soaking.
    • Lingering smells: neutral-pH cleaner, proper drying, and good ventilation.

    There’s also a subtle emotional shift. Sitting in a car that looks and smells chaotic can weigh on you. Clean seats don’t solve life, but they quietly improve how you start and end the day.

    Living with cleaner seats: small habits, noticeable relief

    Once long-standing stains disappear, behaviour changes without effort. Drinks get lids. Kids get a designated crumb zone. The coffee-spilling colleague ends up in the back seat near easy-wipe panels.

    Clean fabric makes new marks obvious. A fresh ketchup drop stands out immediately, prompting quick action instead of silent avoidance.

    Many people worry stained seats make them look careless, especially when driving for work or sharing rides. There’s a lightness in knowing you can offer a lift without apologising for the state of the car. It’s not about perfection. It’s about removing small, unnecessary embarrassments.

    What’s striking is how often people share this method. A neighbour borrows the cleaner for one spot and finishes the whole seat. A before-and-after photo sparks group chats asking for product names. Practical solutions spread quickly when they genuinely save time.

    The no-vinegar, no-baking-soda approach respects your time, your patience, and your sense of smell. You clean the stain once, properly, and move on.

    It’s a reminder that fewer dramatic fixes and more calm, targeted habits often work better. Less self-blame. Better tools. A small corner of daily life reclaimed with minimal effort.

    • Cleaning without vinegar or baking soda: use a dedicated textile cleaner to avoid odours and residue.
    • Two-step method: spray, pause, brush gently, then wipe or extract to protect fibres.
    • Keep a small kit in the boot: handle stains early before they become permanent.
  • Mixing Kiwi Peels With Vinegar Triggers Curiosity as Experts Explain the Unexpected Reason

    Mixing Kiwi Peels With Vinegar Triggers Curiosity as Experts Explain the Unexpected Reason

    The late afternoon light cut sharply across the living room, highlighting every scuff, dull area, and footprint pressed into what were meant to be beautiful hardwood floors. It was the kind of lighting that revealed everything. A friend walked in, looked down, paused, and then offered the polite response: “Oh, I love your floors.”

    They were oak floors—once expensive and impressive. Years of kids, a dog, and wet winter boots had stripped away that warm, magazine-worthy glow. Plenty of fixes had already been tried: pricey so-called miracle cleaners, sticky polishes that left residue, and homemade social-media sprays that smelled sharp and delivered nothing.

    Then an older neighbor casually shared a suggestion, confident in the way only experience allows. “Use this,” she said, “and watch.” The result wasn’t just cleaner floors. They looked alive again.

    The Pantry Staple Hardwood Owners Quietly Trust

    The quiet hero of this story is plain white vinegar. Not a designer cleaner with bold labels, but the basic bottle sitting behind the olive oil. When mixed properly, it helps hardwood floors catch the light again in a way that feels instantly noticeable.

    Vinegar carries a sharp, familiar scent many associate with old kitchens. When diluted for floors, it doesn’t leave behind the sticky film common with commercial cleaners. Instead, it breaks through layers of residue left by soaps, waxes, and everyday buildup that dull the natural look of wood.

    Used correctly, vinegar doesn’t coat the floor. It releases the wood beneath. The grain appears clearer, the color deeper, and the surface feels natural rather than slick.

    Jenna, a homeowner in her thirties with two kids, a demanding job, and a labrador that treats the hallway like a racetrack, learned this firsthand. She had tried three different name-brand polishes that promised “mirror shine.” The result was slippery floors and cloudy patches where product accumulated.

    One weekend, tired of wasting money on bottles under the sink, she tried a simple vinegar mix she’d seen discussed online: one cup of white vinegar in a bucket of warm water. She mopped once, let it dry, then took a photo because the change felt unreal.

    The difference was striking. Before, the floor looked grey, tired, and slightly greasy. After, the reflections were clean and the wood lines sharp. No artificial shine—just bright, honest floors. She sent the photo to her sister with a simple message: “Apparently the answer was 89 cents a bottle.”

    Why Vinegar Restores Shine Instead of Faking It

    This method quietly spreads among neighbors, professional cleaners, and renovation forums for a reason. Vinegar is mildly acidic when diluted, which allows it to dissolve old cleaner residue, mineral deposits from tap water, and everyday grime that makes hardwood look flat.

    Most commercial shine products work by adding a layer—acrylics, oils, or silicone—on top of the floor. It looks good briefly, then starts streaking and trapping dust. Vinegar works in reverse. It removes what doesn’t belong, allowing the original finish to show again.

    When used occasionally, it’s gentle on sealed hardwood. It won’t repair scratches, but by clearing buildup around them, those marks often appear less noticeable. Light spreads more evenly, which is why many homeowners say the same thing: the floor simply looks clearer.

    How to Use Vinegar Safely for Hardwood Floor Shine

    The mixture is straightforward: one cup of white vinegar to about one gallon (four liters) of warm water. Stir gently and avoid adding extra vinegar, which can stress the finish rather than help it.

    Begin by sweeping or vacuuming thoroughly. Grit dulls shine faster than anything. Lightly dampen a microfiber mop—never soaking—and move across the floor, ideally following the wood grain.

    Allow the floor to air-dry naturally. Avoid fans, towels, or forced drying. Within minutes, the hazy look often fades and the natural glow returns. The improvement is sometimes most noticeable after leaving the room and walking back in.

    Overuse is the most common mistake. Because vinegar is inexpensive and effective, it’s tempting to treat it as a daily solution. It works best as a periodic reset, typically every few weeks or once a month in busy households.

    Vinegar should not be used on unsealed or waxed floors. If the finish is unknown, test a small hidden area and observe how it dries. Manufacturer guidelines often discourage vinegar use, largely for liability reasons, though many professional cleaners still rely on it quietly.

    “I’ve been cleaning houses for 20 years,” says Marie, a professional cleaner managing eight homes weekly. “Clients ask about expensive products. I nod, smile, and use vinegar. It doesn’t create shine—it reveals it.”

    Small Habits That Make This Method Work Even Better

    • Use microfiber mops instead of old cotton cloths to prevent streaks.
    • Replace the solution once it turns cloudy to avoid spreading grime.
    • Add one or two drops of essential oil if the vinegar scent is bothersome.
    • Keep shoes near the door; grit dulls floors quickly.
    • Spot-clean spills rather than re-mopping entire rooms.

    Why This Simple Trick Feels Surprisingly Rewarding

    There’s something satisfying about realizing you don’t need shelves of branded cleaners for good-looking floors. Just one pantry staple, warm water, and a few focused minutes. It cuts through the constant noise of advertising that promises perfection for a price.

    Brighter floors subtly change the mood of a room. Morning light looks different when it hits clean wood instead of dull boards. The space feels sharper, calmer, and more intentional.

    This routine also grounds expectations. Perfect homes exist online; real homes have scratches and stories. Running a damp microfiber mop over your own floor creates a small, genuine improvement. Not flawless—just better.

    The method spreads quietly. A neighbor mentions it. A cleaner shares it casually. A comment sits unnoticed beneath a long debate about floor polish trends. It’s rarely the headline, yet it’s the habit people keep using.

    Honestly, no one does this every day. The shine doesn’t depend on strict schedules. It’s forgiving, effective, and delivers a visible reward almost immediately. That’s why, once discovered, people tend to stick with it.

    Key Points at a Glance

    • Diluted white vinegar: One cup per gallon of warm water for an easy, low-cost mix.
    • Best for sealed hardwood: Ideal for polyurethane finishes; always patch-test first.
    • Occasional use: Treat as a reset every few weeks for long-term shine.
  • Daily Yoga Stretches Gradually Improve Flexibility and Reduce Body Tightness

    Daily Yoga Stretches Gradually Improve Flexibility and Reduce Body Tightness

    Flexibility plays a crucial role in maintaining a healthy body and lowering the risk of injuries. Yoga, with its slow, mindful movements and controlled breathing, is one of the most effective ways to increase flexibility. Whether you want to ease tight muscles, improve joint mobility, or support smoother body movement, yoga helps build long-term physical wellness. Below are eight easy yet powerful yoga poses that gently stretch and lengthen the body, improving range of motion naturally.

    Why Flexibility Is Important for Daily Movement

    Flexibility is about more than just touching your toes. It supports healthy joint movement, reduces muscle stiffness, and makes everyday activities feel smoother. Improved flexibility helps maintain better posture, lowers the chance of strains or injuries, and encourages healthy blood circulation. Yoga blends stretching with muscle engagement, offering a safe and balanced approach suitable for all fitness levels.

    Eight Easy Yoga Poses to Improve Flexibility

    Downward Facing Dog (Adho Mukha Svanasana)

    Downward Facing Dog is a foundational pose that stretches the hamstrings, calves, shoulders, and spine. Begin on your hands and knees with wrists under shoulders and knees under hips. Press into your palms, lift your hips upward, and create an inverted “V” shape. Keep arms extended and heels gently reaching toward the floor. Hold for 30 seconds to one minute, breathing deeply to support muscle lengthening.

    Child’s Pose (Balasana)

    Child’s Pose is a soothing posture that gently stretches the lower back, hips, and thighs. Kneel with big toes together and knees slightly apart, sit back onto your heels, and extend your arms forward. Rest your forehead on the mat and remain for one to two minutes. This pose helps release built-up tension while promoting relaxation and flexibility.

    Cat-Cow Pose (Marjaryasana-Bitilasana)

    Cat-Cow Pose is a flowing sequence that improves spinal mobility and flexibility. Start in a tabletop position. Inhale as you drop the belly and lift the chest and tailbone. Exhale while rounding the spine and drawing the chin toward the chest. Continue this movement for one to two minutes to loosen the spine, neck, and hips.

    Standing Forward Fold (Uttanasana)

    Forward Fold offers a deep stretch for the hamstrings and lower back. Stand tall, hinge at the hips, and fold the torso forward. Let the head and neck fully relax, bending the knees slightly if needed. Hold for 30 seconds to one minute to lengthen the spine and release lower-body tension.

    Cobra Pose (Bhujangasana)

    Cobra Pose is a gentle backbend that opens the chest and spine. Lie face down, place palms beneath the shoulders, and press lightly into the floor as you lift the chest. Keep elbows close to the body and avoid compressing the lower back. Hold for 15 to 30 seconds to support spinal flexibility and posture.

    Seated Forward Fold (Paschimottanasana)

    Seated Forward Fold focuses on stretching the hamstrings and spine. Sit with legs extended, inhale to lengthen the spine, then exhale as you fold forward from the hips. Reach for the feet, ankles, or shins without forcing the stretch. Hold for 30 seconds to one minute to enhance lower-body flexibility and promote calmness.

    Butterfly Pose (Baddha Konasana)

    Butterfly Pose is excellent for opening the hips and inner thighs. Sit upright, bring the soles of the feet together, and gently guide the knees toward the floor. Hold the feet and maintain a tall spine. Lean forward slightly if comfortable and stay in the pose for up to one minute.

    Pigeon Pose (Eka Pada Rajakapotasana)

    Pigeon Pose provides a deep stretch for the glutes and hip flexors. From a tabletop position, bring one knee forward and extend the opposite leg behind you. Keep hips squared and either remain upright or fold forward. Hold for 30 seconds to one minute on each side to release deep tension.

    Helpful Tips to Increase Flexibility with Yoga

    • Practice regularly, as consistency supports progress.
    • Use deep, steady breathing to relax muscles during stretches.
    • Warm up before holding poses to prepare the body.
    • Never force movements beyond your comfort level.
    • Allow flexibility to develop gradually with patience and awareness.
  • 11 Balance Exercises for Seniors to Strengthen Stability and Reduce Fall Risk

    11 Balance Exercises for Seniors to Strengthen Stability and Reduce Fall Risk

    Balance Exercises for Older Adults Try these 11 balance exercises designed specifically for older adults to help prevent falls. Falls are one of the main causes of injuries in people over 65 years old. These movements improve your balance and build muscle strength. Both are essential for staying independent and safe as you age.

    1. Controlled Weight Transfers for Better Body Awareness

    Balance Exercises for Older Adults Try these 11 balance exercises designed for older adults to help prevent falls. Falls are one of the main causes of injuries in people over 65 years old. These movements improve your balance and build muscle strength. Both are essential for staying independent and safe as you age. Why Balance Matters Good balance helps you move confidently through daily activities. It reduces your risk of falling and lets you maintain your active lifestyle. Strong muscles support your joints & make it easier to recover if you start to lose your balance.

    2. Standing Heel Lifts to Build Ankle Strength and Balance

    Heel Raises Heel raises help improve your balance and make your calf muscles stronger. These muscles are important for walking and going up stairs.

    How to do heel raises: Stand with your feet about hip-width apart. You can hold onto something steady like a chair or counter for support. You can also put your hands on your hips if you feel balanced enough. Lift your heels off the ground so you are standing on the balls of your feet. Stay in this position for one or two seconds. Then slowly lower your heels back down to the floor.

    Making it more challenging: If you want to make this exercise harder you can try doing it on one foot at a time. This will require more balance & strength from each leg individually.

    3. Gentle Forward and Backward Steps for Stability Control

    Forward and Backward Stepping Exercise After you have mastered weight-shifting exercises, you can move on to forward and backward stepping. You have two options for completing this exercise. You can finish all repetitions on one leg before moving to the other leg or you can switch between legs after each repetition to increase the difficulty level. Here is how to perform the exercise: Begin by standing with your feet positioned at hip-width distance. Let your arms hang naturally at your sides. Move your right foot forward & then return it to the starting position. Move your right foot backward and then return it to the starting position. Perform the same movements with your left foot.

    4. Feet-Together Standing to Improve Core Balance

    Standing Balance Exercise When you stand with your feet together you create a smaller base that makes balancing harder. This exercise gets more challenging as you improve. Start by standing with your arms stretched out to both sides. Move your feet together until they touch. Stay in this position as long as possible without moving your feet. After you can hold this for one minute try it again with your arms hanging at your sides. Make it harder by crossing your arms over your chest. When that becomes easy go back to holding your arms out to the sides but this time close your eyes.

    5. Walking with Head Turns to Enhance Coordination

    Your balance depends on multiple body parts working together and your vision plays an important role. You can improve your balance by changing where you look while you move. This exercise helps train your body to stay stable even when your head turns in different directions. Start by walking forward at a slow and controlled pace. While you continue moving ahead turn your head to the right & look back over your right shoulder. Bring your head back to face forward again. Next turn your head to the left and look over your left shoulder. Keep switching between looking right and looking left as you walk. Repeat this pattern for as long as you want to practice. This simple activity strengthens the connection between your eyes and your balance system. Regular practice can help you feel more steady on your feet during everyday activities.

    6. Side-to-Side Stepping for Lateral Balance Support

    Side-stepping can be done by sliding your hands along a counter for extra support until you feel comfortable doing it without holding on. Here is how to do it: Stand with your feet positioned at hip width. Keep your toes pointing forward and take a small step to the right using your right foot. Move your left foot next to your right foot. Continue this pattern for the distance you want to cover and then side-step in the other direction to return to where you started.

    7. Forward Step-Ups to Strengthen Legs and Confidence

    Forward Step-Ups for Better Balance Forward step-ups help you maintain better balance when doing everyday activities like walking up stairs. This exercise is practical because it mimics movements you already do throughout your day. You can do this exercise at the bottom of any staircase in your home. Hold onto the handrail whenever you need extra support. If regular stairs feel too high (most are about 7 inches tall) you can use a lower platform or sturdy box instead.

    How to Do Step-Ups Start by standing in front of the step. Put your right foot on the step first. Bring your left foot up to meet it on the step. Step back down with your left foot to the floor. Then bring your right foot down to the floor. Switch which foot leads each time you repeat the exercise. This simple movement pattern strengthens your legs and trains your body to handle stairs more confidently. Practice regularly to see the best results in your daily activities.

    8. Side Step-Ups for Hip Stability and Fall Prevention

    You should only try side step-ups after you can safely perform them moving forward. Find a step or stable raised platform that is wide enough to hold both feet. Follow these steps to do side step-ups: Position yourself so the right side of your body faces the step. Place your right foot on the step. Lift your left foot up to join it on the step. Lower your left foot back down to the floor. Bring your right foot down to the floor. Complete 10 repetitions on this side. Then turn around so your left side faces the step and do 10 more repetitions using the opposite leg to lead.

    9. Heel-to-Toe Standing to Sharpen Balance Focus

    Tandem standing is a more challenging exercise you can try after you feel comfortable standing with your feet placed together. Here is how to do tandem standing:5 Stand up & extend your arms straight out to each side at shoulder level. Place your right foot directly in front of your left foot so the heel of your right foot touches the toes of your left foot. Stay in this position for as long as possible without moving your feet. Switch sides and repeat with your left foot positioned in front of your right foot. You can make this exercise harder by letting your arms hang down at your sides or by crossing your arms over your chest. To add an even greater challenge you can attempt tandem standing while keeping your eyes closed.

    10. One-Leg Standing to Improve Overall Stability

    When you begin balance exercises try standing on one leg next to a solid surface that you can grab if needed. Here is how to do a single-leg stance:5 Stand near a solid surface. Lift your right foot by bending your knee and bringing your heel toward your backside while keeping your body upright. Put your weight on your left foot and stay balanced for as long as you can without moving. Switch legs & repeat. You can make this exercise more challenging by closing your eyes or standing on an unstable surface like a cushion or pillow.

    11. Cross-Step Walking to Boost Coordination and Control

    Braiding Exercise Instructions The braiding exercise is also known as the grapevine or karaoke exercise. This is an advanced balance activity. Here is how to do it: Start by standing with your feet positioned at hip-width apart. Let your arms hang naturally at your sides. If you need extra balance support you can extend your arms straight out to each side so they are parallel to the floor. Take your right leg and cross it over in front of your left leg. Then bring your left foot out from behind your right foot and step it to the left side. Next cross your right leg behind your left leg. After that step your left leg out to the side again. Keep repeating this movement pattern as you travel sideways for whatever distance you want to cover. When you reach your endpoint reverse all the movements and work your way back to your starting position.

  • Simple Yoga Poses Improve Flexibility and Ease Persistent Muscle Tightness

    Simple Yoga Poses Improve Flexibility and Ease Persistent Muscle Tightness

    Flexibility plays a crucial role in maintaining a healthy body and lowering the risk of injuries. Yoga, with its slow, mindful movements and controlled breathing, is one of the most effective ways to increase flexibility. Whether you want to ease tight muscles, improve joint mobility, or support smoother body movement, yoga helps build long-term physical wellness. Below are eight easy yet powerful yoga poses that gently stretch and lengthen the body, improving range of motion naturally.

    Why Flexibility Is Important for Daily Movement

    Flexibility is about more than just touching your toes. It supports healthy joint movement, reduces muscle stiffness, and makes everyday activities feel smoother. Improved flexibility helps maintain better posture, lowers the chance of strains or injuries, and encourages healthy blood circulation. Yoga blends stretching with muscle engagement, offering a safe and balanced approach suitable for all fitness levels.

    Eight Easy Yoga Poses to Improve Flexibility

    Downward Facing Dog (Adho Mukha Svanasana)

    Downward Facing Dog is a foundational pose that stretches the hamstrings, calves, shoulders, and spine. Begin on your hands and knees with wrists under shoulders and knees under hips. Press into your palms, lift your hips upward, and create an inverted “V” shape. Keep arms extended and heels gently reaching toward the floor. Hold for 30 seconds to one minute, breathing deeply to support muscle lengthening.

    Child’s Pose (Balasana)

    Child’s Pose is a soothing posture that gently stretches the lower back, hips, and thighs. Kneel with big toes together and knees slightly apart, sit back onto your heels, and extend your arms forward. Rest your forehead on the mat and remain for one to two minutes. This pose helps release built-up tension while promoting relaxation and flexibility.

    Cat-Cow Pose (Marjaryasana-Bitilasana)

    Cat-Cow Pose is a flowing sequence that improves spinal mobility and flexibility. Start in a tabletop position. Inhale as you drop the belly and lift the chest and tailbone. Exhale while rounding the spine and drawing the chin toward the chest. Continue this movement for one to two minutes to loosen the spine, neck, and hips.

    Standing Forward Fold (Uttanasana)

    Forward Fold offers a deep stretch for the hamstrings and lower back. Stand tall, hinge at the hips, and fold the torso forward. Let the head and neck fully relax, bending the knees slightly if needed. Hold for 30 seconds to one minute to lengthen the spine and release lower-body tension.

    Cobra Pose (Bhujangasana)

    Cobra Pose is a gentle backbend that opens the chest and spine. Lie face down, place palms beneath the shoulders, and press lightly into the floor as you lift the chest. Keep elbows close to the body and avoid compressing the lower back. Hold for 15 to 30 seconds to support spinal flexibility and posture.

    Seated Forward Fold (Paschimottanasana)

    Seated Forward Fold focuses on stretching the hamstrings and spine. Sit with legs extended, inhale to lengthen the spine, then exhale as you fold forward from the hips. Reach for the feet, ankles, or shins without forcing the stretch. Hold for 30 seconds to one minute to enhance lower-body flexibility and promote calmness.

    Butterfly Pose (Baddha Konasana)

    Butterfly Pose is excellent for opening the hips and inner thighs. Sit upright, bring the soles of the feet together, and gently guide the knees toward the floor. Hold the feet and maintain a tall spine. Lean forward slightly if comfortable and stay in the pose for up to one minute.

    Pigeon Pose (Eka Pada Rajakapotasana)

    Pigeon Pose provides a deep stretch for the glutes and hip flexors. From a tabletop position, bring one knee forward and extend the opposite leg behind you. Keep hips squared and either remain upright or fold forward. Hold for 30 seconds to one minute on each side to release deep tension.

    Helpful Tips to Increase Flexibility with Yoga

    • Practice regularly, as consistency supports progress.
    • Use deep, steady breathing to relax muscles during stretches.
    • Warm up before holding poses to prepare the body.
    • Never force movements beyond your comfort level.
    • Allow flexibility to develop gradually with patience and awareness.
  • Yoga Poses Release Body Stiffness Improve Flexibility and Support Everyday Comfort

    Yoga Poses Release Body Stiffness Improve Flexibility and Support Everyday Comfort

    Body stiffness affects many people due to prolonged sitting, limited daily movement, and rising levels of stress. As we age, muscles naturally tighten, and even intense workouts can sometimes increase stiffness instead of easing it. When muscles and joints remain tight for long periods, movement becomes restricted, often leading to discomfort in the neck, back, hips, and legs.

    Yoga offers a gentle and effective way to loosen tight areas without placing excess strain on the body. With consistent practice, it helps restore natural movement patterns and gradually improves flexibility and mobility. Practising the following poses regularly, while breathing slowly and mindfully, can help reduce stiffness and support overall body comfort.

    Mountain Pose (Tadasana) — Restore Alignment and Activate Tight Muscles

    Mountain Pose improves postural awareness and encourages proper spinal alignment. Standing tall activates key muscles that support balance and flexibility, making it an ideal starting pose for easing tightness throughout the body.

    Neck Rolls — Ease Neck Tension from Screens and Stress

    Slow and controlled neck rolls help relieve built-up stiffness caused by extended screen use and daily stress. Gentle movement improves blood circulation and reduces tension in the neck and shoulders.

    Cat–Cow Flow — Mobilise the Spine and Reduce Back Stiffness

    Cat–Cow is a flowing sequence that gently stretches the entire spine while engaging the shoulders, hips, and neck. This movement supports both flexibility and mobility, making it effective for full-body stiffness relief.

    Downward-Facing Dog — Lengthen Muscles and Improve Full-Body Flexibility

    This pose lengthens the spine, opens the shoulders, and stretches the hamstrings and calves. It also builds strength in the arms and core, helping reduce stiffness caused by long hours of sitting.

    Standing Forward Bend — Stretch Hamstrings and Calm the Nervous System

    Standing Forward Bend provides a deep stretch for the back, hamstrings, and calves. It helps release lower-body tension while encouraging relaxation and calming the nervous system.

    Low Lunge — Open Hip Flexors and Improve Lower-Body Mobility

    Low Lunge effectively stretches the hips, thighs, and groin. It is especially helpful for relieving stiffness that develops from extended sitting and limited movement.

    Butterfly Pose — Gently Release Hip and Inner-Thigh Tightness

    Butterfly Pose works to open the hips and inner thighs in a gentle way. Regular practice helps reduce lower-body stiffness and gradually improves hip flexibility.

    Seated Spinal Twist — Support Spinal Rotation and Reduce Back Tension

    Seated twists improve spinal mobility and ease tightness in the back and waist. This movement also supports digestion and contributes to overall flexibility.

    Cobra Pose — Reverse Slouching and Relieve Lower-Back Tightness

    Cobra Pose strengthens the back muscles while stretching the chest and abdomen. It helps counter the effects of poor posture and increases spinal flexibility for better overall back health.

    Child’s Pose — Deeply Relax the Spine, Shoulders, and Hips

    Child’s Pose allows the body to fully relax while gently stretching the spine, shoulders, and hips. This restorative position helps release built-up tension and supports overall body relaxation.

    Supine Figure Four — Release Hip Tension and Support Lower-Back Comfort

    This reclining pose targets tight hips and glutes while keeping the spine supported. It reduces lower-body stiffness without placing strain on the muscles.

    Legs Up the Wall — Improve Circulation and Ease Daily Body Fatigue

    Legs Up the Wall encourages better blood circulation and helps ease tightness in the legs and lower back. It also promotes deep relaxation, allowing the body to recover at the end of the day.

  • Heating Rules Changed Quietly and the Old 19 Degree Advice No Longer Works

    Heating Rules Changed Quietly and the Old 19 Degree Advice No Longer Works

    You touch the thermostat and see 19 °C. The number everyone knows. The so-called “responsible” setting repeated for years through energy campaigns, rising bills, and climate messages. It has become second nature.

    But your feet feel cold. Your teenager stays wrapped in a hoodie indoors. Your elderly mother, visiting for the weekend, quietly pulls a blanket over her legs and says she’s fine. You start wondering whether 19 °C is truly a universal comfort point, or just a habit we stopped questioning.

    You are far from alone. Across Europe, this winter has sparked renewed discussion among doctors, building specialists, and public health professionals. Their guidance is shifting quietly, and the updated recommendation is not what most people expect.

    The long-standing 19 °C rule meets everyday reality

    For decades, 19 °C has been promoted as the ideal balance: warm enough for comfort, low enough to reduce energy use. A simple, tidy compromise.

    However, the science behind that figure dates back to a very different era. Homes were built differently, daily routines involved more movement, and populations were younger overall.

    Today’s homes are better insulated but often more airtight. Many people spend long hours sitting, working at screens, or resting on sofas. At the same time, populations are aging, with more individuals living with circulatory or respiratory conditions that make cooler indoor temperatures harder to tolerate. What felt acceptable decades ago can now feel uncomfortably cold.

    Energy poverty has also increased sharply. In many households, indoor temperatures drop to 17–18 °C not by choice, but out of fear of rising energy bills. When experts revisited the evidence, a difficult question emerged: are homes being under-heated, and is health paying the price?

    Surveys in the UK revealed a telling gap between advice and reality. When adults were asked about their actual winter settings, living rooms averaged 21–22 °C, even among those aware of the 19 °C recommendation. Daily practice has quietly moved higher.

    Public health data reinforced this shift. Hospital admissions for respiratory illnesses, heart issues, and even mental health crises rise during prolonged cold periods. These effects appear not only in extreme cold, but also in homes kept below roughly 20–21 °C over time.

    Current guidance indicates that healthy adults should not remain in homes below 18 °C, while older adults and other vulnerable individuals require closer to 20–21 °C for safety.

    When comfort and efficiency are considered together, many specialists now converge on a new range: around 20–21 °C in main living spaces. Not excessive, not uncomfortable, but adapted to real human needs rather than slogans.

    Seen in that light, 19 °C no longer appears as an ideal target, but as a minimum threshold.

    A revised target of 20–21 °C, applied selectively

    The updated guidance does not promote one rigid temperature for an entire home. Instead, experts increasingly recommend zoned heating, where warmth is focused on rooms that are actively used.

    Living rooms and home-office spaces are now commonly set at 20–21 °C, providing a healthier and more realistic baseline for most adults. Bedrooms, by contrast, can remain cooler, typically between 17–19 °C, which many people find supportive of better sleep. Kitchens, hallways, and transitional spaces may sit lower still, especially when used briefly.

    This approach replaces the idea of a uniform temperature with a layered home: a comfortable core surrounded by cooler areas.

    In practice, this means using thermostatic radiator valves or smart controls to adjust each room individually. Evening time spent in the living room justifies a higher setting there, while a rarely used guest room can safely remain at 16–17 °C, provided dampness is avoided.

    Experts also stress an often overlooked factor: perceived temperature. Cold walls, drafts near the floor, or uninsulated surfaces can make 20 °C air feel significantly colder. The thermostat reading alone does not define comfort; the building envelope plays a crucial role.

    Public messaging that clings to a single number overlooks how bodies, homes, and habits vary. The emerging advice reflects this complexity, favouring modestly warmer occupied spaces combined with better control and reduced heat loss.

    Heating efficiently at 20–21 °C without driving up costs

    The concern about increasing the thermostat is understandable. Energy costs already feel heavy, and each additional degree can seem expensive.

    Yet heating specialists note that maintaining a steady 20–21 °C can be more efficient than cycling between very cold and very warm conditions. Heating systems operate best when they run steadily rather than stopping and starting repeatedly.

    One commonly recommended strategy is low and slow heating. This involves setting living areas to around 20–21 °C while lowering the boiler’s flow temperature, often to 50–60 °C instead of much higher levels. Radiators remain warm for longer periods, and overall efficiency improves.

    Smart thermostats can assist when used thoughtfully. Instead of allowing indoor temperatures to drop sharply overnight, a gentle reduction to 18–19 °C helps avoid energy-intensive reheating in the morning.

    Another barrier is emotional rather than technical. Many people feel guilty setting their heating above 19 °C, as though comfort conflicts with responsibility. This often leads to short bursts of higher heat during cold evenings, followed by regret.

    Health professionals are clear that long-term exposure to cold indoor environments carries real risks, particularly for children, older adults, and those with existing conditions. Persistent cold is not a virtue and does not represent sustainable living.

    More effective savings often come from elsewhere: sealing drafts, insulating lofts, improving windows, maintaining radiators, and closing shutters at night. Small interventions can deliver greater benefits than constant adjustments of half a degree.

    As some specialists now frame it, the priority is maintaining a healthy indoor temperature range while reducing waste through better buildings and smarter systems, rather than encouraging discomfort.

    • Updated living-area target: around 20–21 °C for most adults.
    • Lower temperatures where appropriate: cooler bedrooms and unused rooms kept just above 16 °C.
    • Meaningful energy savings: focus on insulation, draft-proofing, and stable settings.

    Moving beyond the 19 °C mindset

    The 19 °C rule still appears frequently, in older leaflets, casual conversations, and half-remembered advice. Over time, it has shifted from evidence-based guidance to cultural habit.

    Current expert thinking is more nuanced and more human. The message is not to ignore energy use, but to stop treating 19 °C as a moral ceiling. Comfort, health, and building quality all matter.

    Most people recognise the awkwardness of a living room where guests keep their coats on slightly too long. No one mentions it, yet the discomfort is shared. The revised guidance offers quiet permission to adjust the dial and focus efforts where they make the most difference.

    Some households will continue to prefer 19 °C because it suits them or fits their budget. Others will settle at 21 °C and feel noticeably better. The real change lies in moving from one rigid number to a flexible, informed range.

    Heating is not only about energy units; it reflects how people live, age, and rest in their homes. Recognising the value of comfort, balanced with efficiency and smarter design, marks a meaningful shift.

    The next time you hesitate in front of the thermostat, remember that the 19 °C rule belongs to another time. The goal now is to find a temperature that supports both health and sustainability, shaped by your home and your daily life.

    • New target range: approximately 20–21 °C in occupied living areas.
    • End of uniform heating: room-by-room settings based on actual use.
    • Focus on health and building performance: reduce cold homes through insulation, air-sealing, and smarter controls.
  • Grey Hair Is Darkening Again Thanks to a Shampoo Additive Trend

    Grey Hair Is Darkening Again Thanks to a Shampoo Additive Trend

    She touches her roots in the mirror and leans closer before stepping back as if denying what she just saw. Silver threads catch the neon light. She sighs and picks up a dark chestnut box and reads the instructions before quietly putting it back. Too long. Too chemical. Too much trouble for a Tuesday night. Two shelves down another shopper scrolls on her phone & whispers that there has to be something easier than this. A reel flashes showing how adding something to your shampoo makes grey hair look darker in weeks. She pauses. The ingredients are already at home. No gloves needed. No visible line on the scalp. Just a bottle in the shower & a small routine that doesn’t announce you’re fighting age. The dye box stays on the shelf. Her shampoo suddenly seems like a secret weapon. But what if a simple trick really could change things a little?

    Why gentle grey darkening has captured so much attention

    Grey hair once felt like a final judgement. Today, it feels more like an ongoing conversation. Many people no longer want to erase grey completely; they want it softer, deeper in tone, and less obvious at first glance. You see it everywhere now: natural hair touched by a subtle haze of silver instead of harsh, high-contrast roots that announce a missed dye appointment.

    This shift goes beyond appearance. Attitudes are changing. There’s growing exhaustion with heavy colouring routines, long salon sessions, and strong chemical smells. In their place is curiosity for small, quiet adjustments — adding something simple to shampoo, using a familiar kitchen ingredient, choosing a minor tweak over a dramatic change.

    On a rainy Monday in London, 49-year-old Emily shared her experience over coffee. Spotting white strands at her temples during a video call didn’t make her think she looked older; it made her feel she looked tired. A single attempt at permanent dye left her hair flat, artificial, and unfamiliar. Later, she read about mixing coffee or black tea into shampoo to gradually darken greys. No instant results, no obvious transformation — just slow, subtle deepening. Within weeks, friends commented on how refreshed she looked, without mentioning her hair. That quiet success was exactly what she wanted.

    She’s far from alone. Beauty retailers report rising searches for natural grey hair darkening and dye-free grey coverage. These trends aren’t about hiding age; they’re about choice and control. People want to keep some silver, soften others, and experiment without committing to harsh chemicals. They’re choosing solutions that feel manageable and human-scaled.

    Grey hair appears when pigment production slows. Hair follicles rely on melanocytes to create melanin, and as these cells reduce activity, strands lose colour and appear white or grey. Traditional dyes use strong agents to force colour deep into the hair quickly. Newer, gentler approaches work differently. Plant-based pigments and natural tannins cling to the hair’s surface, similar to how tea stains fabric. The colour fades gradually, but the process is often kinder to the scalp. Instead of overpowering biology, the goal is to work with it softly, wash by wash.

    So when someone says, “Just add this to your shampoo,” they’re really offering a slower, more forgiving agreement with time.

    The simple shampoo trick that subtly changes grey hair

    The concept is surprisingly straightforward. By adding a natural colour source to your regular shampoo, you create a mild darkening wash that builds gradually. The most common choice is a strong infusion of black tea or coffee. It’s like brewing a concentrated tint directly into the bottle you already use.

    A strong tea or coffee is prepared, cooled completely, then mixed into a gentle shampoo and shaken well. With each wash, natural pigments lightly stain the hair’s outer layer. There’s no need for gloves, timers, or enduring chemical smells. Just an extra minute under warm water, massaging what looks like ordinary lather.

    Some people enhance the mix with small amounts of powdered herbs such as sage, rosemary, or amla. At that point, the process becomes a ritual. A jar on the counter, steam rising from a mug, a spoon stirring dark liquid. The result is never full coverage. Instead, greys soften into muted highlights rather than stark contrasts.

    Frustration usually appears when expectations are unrealistic. Trying it once or twice won’t turn white hair black. These ingredients create translucent layers that build slowly, like watercolour washes. Very light or coarse hair may show only modest change at first.

    Hair texture plays a role. Thick, resistant strands may respond better to stronger brews or occasional pre-wash masks. Fine hair can darken more quickly but may show buildup sooner. Daily perfection isn’t required. This approach is meant to fit real routines, not idealised schedules.

    Overdoing it is the most common mistake. Excess coffee can dry hair, while overly strong tea may leave a dull coating. The balance between gently tinted and overloaded is delicate. It’s best treated like seasoning — gradual adjustments work better than extremes.

    As Marco, 57, put it: “At first, I thought nothing had changed. Then someone said I looked more rested. That’s when I realised it worked — it didn’t hide my age, it softened it.”

    Many people follow a loose routine rather than a strict formula:

    • Brew 250 ml of very strong black tea or coffee and allow it to cool fully.
    • Pour half into an almost empty bottle of mild shampoo and shake well.
    • Use the mixture 2–3 times a week, leaving it on for 3–5 minutes.
    • Observe results for two weeks before increasing strength.
    • Dilute or pause if hair feels dry, adding light conditioner if needed.

    On paper, it seems simple. In practice, it becomes a small pause — a moment to decide how you want your reflection to change alongside you, not against you.

    What living with softer greys really shifts

    For many, the lasting impact isn’t just darker strands. It’s the mental shift. When silver looks like a gentle shadow instead of a spotlight, people feel freer to grow their hair out, change their part, or rely less on heavy makeup. The mirror becomes less of an adversary.

    There’s also relief. No more rushed salon visits before events, no last-minute box dye panic. The shampoo method doesn’t remove greys; it lowers their volume. They’re still there, but quieter. That space allows other features — texture, movement, posture — to stand out more naturally.

    Some days, bright light still reveals every white strand. That hasn’t changed. What has changed is the sense of personal agency. Instead of waiting for drastic fixes, people are doing something small and consistent. Over time, this builds a truce with their hair. They experiment again, adjusting tones, trying herbal rinses, styling in ways that let softened greys frame the face rather than hide.

    The ritual sparks conversation too. When asked about their colour, the answer is often simple and honest: “I didn’t dye it — I just add tea to my shampoo.” It sounds modest, yet it carries meaning. Aging becomes less about loss and more about tiny, intentional adjustments.

    Friends exchange tips the way they share recipes. Some prefer rosemary and clove for warmer tones; others notice changes in hair feel. Not everything is backed by formal studies, but shared experience creates its own form of proof — what works well enough to keep doing.

    This approach doesn’t promise to reverse time. It lives in a different space: adjusting contrast instead of erasing lines. For many, that’s the real magic — small, repeatable, and barely visible to others, yet deeply felt during a quiet moment under the shower as the foam swirls away.

    Point clé Détail Intérêt pour le lecteur
    Gentle darkening Tea or coffee pigments lightly stain hair over time Offers a softer way to reduce the contrast of grey
    Simple routine Adds one step to the shampoo you already use Makes consistency realistic in a busy daily life
    Customisable results Adjust strength, frequency and ingredients Allows you to find a personal balance with your greys
  • These 3 seated exercises help tone arms after 50 without push-ups

    These 3 seated exercises help tone arms after 50 without push-ups

    Strong, sculpted arms aren’t only a seasonal fitness goal. If you’re new to exercise, or if standing or getting down on the floor for moves like push-ups feels challenging, knowing where to begin can be difficult. The good news is that there’s an easy starting point — three simple, seated exercises that help strengthen and shape your upper body using only your bodyweight.

    Building a strong upper body goes far beyond appearance. Upper-body strength supports everyday movements such as lifting shopping bags or laundry, reaching items on high shelves, opening doors, or pushing yourself up from a chair. As we age, this strength becomes even more important. A well-conditioned upper body can help reduce injury risk during falls and supports balance and control when climbing stairs or moving independently.

    As with any new routine, if you’re recovering from an injury or managing specific mobility limitations, it’s wise to consult a qualified professional before starting. While these exercises are suitable for most people, stop immediately if you feel pain and seek guidance to ensure proper form and avoid unnecessary strain.

    What Does the Workout Involve?

    This routine was created by Deron Buboltz, a certified Strength and Conditioning Specialist for Seniors. It includes three bodyweight exercises. Perform each movement for 20 seconds and repeat the full circuit five times to complete a five-minute workout. Short rest breaks between rounds are optional if needed.

    Exercises Included in the Routine

    Chicken-wing arm raises: Sit upright in your chair and engage your core by gently drawing your belly button toward your spine. With elbows bent, lift both arms out to your sides. Hold briefly at the top, then slowly lower them back toward your body.

    Double-jab movement: Begin with your arms raised and elbows bent. Focus on squeezing your shoulder blades together. Make a fist with each hand and extend both arms straight forward. Pause, then bend your elbows to return to the starting position.

    Double-arm flutter: Stretch your arms forward, away from your body. Gently flutter them up and down. This movement also supports better circulation while activating the upper-body muscles.

    This workout targets areas often referred to as “flabby arms.” While fat loss can’t be isolated to one spot, these exercises effectively engage the triceps, biceps, and shoulder muscles. For added intensity, you can hold light dumbbells in each hand as you perform the movements.

    Stay informed and inspired by signing up for the best of Tom’s Guide. Get quick access to breaking news, top reviews, standout deals, and practical tips delivered straight to your inbox.

  • Forget crunches and sit-ups as this beginner-friendly core workout builds strength without strain

    Forget crunches and sit-ups as this beginner-friendly core workout builds strength without strain

    For many beginners in India, traditional crunches and sit-ups can feel uncomfortable, intimidating, or even risky for the lower back and neck. That’s why more people are turning to gentler core routines that still deliver real strength gains without unnecessary strain. This beginner-friendly core workout focuses on controlled movements, breathing, and stability rather than force. It helps activate deep abdominal muscles, improve posture, and support everyday movements. Best of all, it’s accessible for all fitness levels and fits easily into a regular home workout routine.

    Beginner-friendly core workout without crunches

    This beginner-friendly core workout replaces high-pressure movements with slow, intentional exercises that prioritize form. Instead of flexing the spine repeatedly, you focus on maintaining alignment and tension through moves like dead bugs and standing core holds. These exercises promote spine-friendly training, encourage deep muscle activation, and support better body control. Because the movements are low impact, they’re easier to learn and safer for those returning to exercise. Over time, this approach builds a strong foundation that supports balance, posture, and daily tasks without overwhelming the body.

    How this no sit-up core routine builds strength

    A no sit-up core routine works by engaging stabilizing muscles that are often ignored in traditional ab workouts. When you resist movement rather than create it, your core learns to brace and protect the spine. This leads to functional core strength, improved joint stability focus, and balanced muscle engagement. Beginners often notice better posture and reduced discomfort during daily activities. Because the exercises emphasize control, they also help develop coordination and confidence, making it easier to progress to more advanced workouts later.

    Why beginners benefit from low-strain core exercises

    Low-strain core exercises are especially valuable for beginners because they reduce the risk of overuse injuries and soreness. By avoiding aggressive spinal flexion, these movements encourage safe movement patterns, promote steady strength progress, and support long-term consistency. Many people find they’re more likely to stick with a routine that feels manageable and rewarding. Over time, this consistency leads to stronger muscles, improved mobility, and a greater sense of confidence in one’s physical abilities.

    Summary and practical takeaway

    Skipping crunches doesn’t mean skipping results. A beginner-friendly core workout that focuses on stability, breathing, and alignment can be just as effective, if not more. This approach supports everyday movement ease, encourages mindful exercise habits, and builds lasting core resilience. For beginners in India looking to start safely, these low-strain routines offer a practical, sustainable way to develop strength without discomfort or fear of injury.

    Exercise Type Main Benefit Strain Level
    Dead Bug Core stability Low
    Standing Knee Lift Balance support Low
    Bird Dog Spine control Low
    Plank Hold Total core engagement Moderate

    Frequently Asked Questions (FAQs)

    1. Is this core workout suitable for complete beginners?

    Yes, it’s designed to be safe, simple, and easy to follow.

    2. How often should beginners do this routine?

    Two to three times per week is ideal for steady progress.

    3. Do I need any equipment for this workout?

    No equipment is required; bodyweight is enough.

    4. Can this replace traditional ab workouts?

    Yes, it can effectively build core strength without crunches or sit-ups.